Bike Camera Accessories Every Cyclist Needs for Better Videos
Posted by Liem Anaida
Filed in Technology 40 views
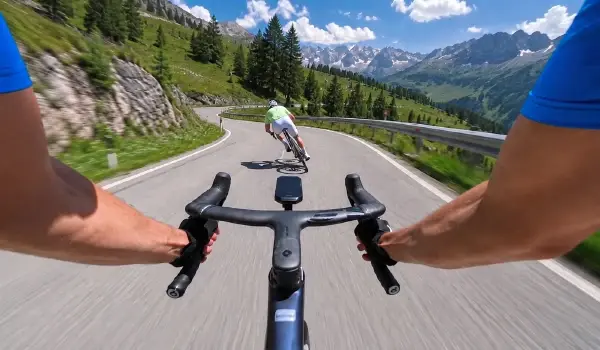
An action camera for cycling can transform an ordinary ride into a clear, immersive video—provided it is supported by the right accessories. The camera itself matters, but mounts, batteries, memory cards, protective gear, and audio tools determine whether your footage is stable, usable, and ready to share.
Cyclists deal with unique filming challenges. Pavement vibration, technical trails, sudden changes in light, wind noise, rain, long ride durations, and limited storage space can all affect the final result. The right accessory setup helps solve these problems without making the bike heavy, cluttered, or difficult to ride.
Whether you record city commutes, road rides, bikepacking trips, mountain-bike descents, gravel adventures, or race-day efforts, this guide covers the essential accessories that help you get more from an action camera for cycling.
1. A Secure Bike Mount
A reliable mount is the most important accessory after the camera itself. Even a camera with excellent image stabilization cannot fully compensate for a loose, poorly positioned, or poorly secured mount.
Handlebar mounts are a popular option because they provide a forward-facing perspective and can capture the road, trail, cockpit, and surrounding scenery. This is especially useful for road cycling, commuting, touring, and gravel riding. Look for a mount with a firm clamp, a secure locking system, and compatibility with your camera’s mounting interface.
For rough terrain, choose a mount designed to resist vibration. Check the mount before every ride, especially after riding over potholes, roots, cobbles, or jumps. A mount that looks secure at home can shift after repeated impacts on the trail.
A good action camera for cycling should be mounted where it does not block your cycling computer, front light, brake cables, or access to controls. Riders who want a clean setup may prefer an out-front mount with an action-camera adapter. This position often provides a centered perspective while keeping the handlebars less crowded.
2. Helmet and Chest Mounts
Bike-mounted footage shows the route ahead, but body-mounted footage can make a video feel more personal and dynamic. Helmet and chest mounts offer different perspectives, and many cyclists use both depending on the ride.
A helmet mount gives the viewer a rider’s-eye view. Because the camera follows your head, it captures where you look: approaching corners, trail features, traffic, scenic views, and other riders. This can be highly immersive for mountain biking, trail riding, commuting, and adventure cycling.
However, helmet footage can become difficult to watch if you constantly look around. Turning your head quickly may create abrupt camera movement, even when stabilization is active. Use a stable helmet mounting base and position the camera so it does not interfere with ventilation, fit, or safety equipment.
A chest mount creates a lower, more grounded viewpoint. It often shows the handlebars, arms, front wheel, and trail surface, giving viewers a stronger sense of speed and terrain. This makes chest mounts especially effective for mountain biking and gravel riding.
For smoother video, many riders find that a chest mount produces more consistent footage than a helmet mount because the torso moves less than the head. Test both positions before an important ride and review the footage to see which angle fits your content style.
3. Quick-Release Adapters
Quick-release adapters make an action camera for cycling far more practical. Instead of removing screws or adjusting a clamp each time you change position, you can move the camera between a handlebar mount, helmet mount, chest harness, or handheld grip in seconds.
This flexibility matters when conditions change. You may want a handlebar view during a calm road segment, a helmet view for a technical trail, and a rear-facing setup during a busy commute. A quick-release system helps you capture different perspectives without carrying a complicated toolkit.
When selecting adapters, prioritize secure locking over convenience alone. A quick-release mount should click firmly into place, remain stable during vibration, and have a backup tether option for demanding terrain. Check compatibility before buying; some systems use proprietary mounting standards, while others work with common action-camera-style mounts.
Quick-release accessories are particularly valuable for creators who film longer rides. They let you vary the visual story rather than recording the entire route from one fixed angle.
4. Spare Batteries and a Dual Charger
Battery management is essential for cycling videos. High-resolution recording, high frame rates, image stabilization, GPS functions, and Wi-Fi can consume battery power quickly. A long ride can easily outlast a single battery, especially when recording at 4K.
Carrying spare batteries is one of the simplest ways to avoid missing key moments. Keep them in a small protective case so they do not collect dirt, moisture, or debris in a jersey pocket or saddlebag. In cold conditions, store spare batteries close to your body until you need them, because low temperatures can reduce runtime.
A dual-battery charger is equally useful. It allows you to charge two batteries at once before a ride, during a lunch stop, or overnight on a multi-day trip. If you create cycling content regularly, a charger that also displays battery status can make preparation faster and more reliable.
For longer adventures, consider a compact power bank. It can recharge batteries during café stops, at campsites, or from a bikepacking bag. Recording in high-definition modes can create significant power demands, so battery planning should be part of your route preparation. Cycling camera guides commonly emphasize spare batteries, power banks, and quick-release mounting options for longer recording sessions.cyclingnews+1
5. A Fast, High-Capacity microSD Card
A camera is only as useful as the storage card inside it. Video files, particularly 4K footage and high-frame-rate clips, can fill storage quickly. A slow or low-quality microSD card may also cause recording errors, dropped frames, or stopped recordings.
Choose a card from a reputable manufacturer that meets the action camera’s recommended speed requirements. Look for video-speed ratings suitable for high-bitrate recording, and check your camera’s maximum supported capacity before buying. If you shoot frequently, having two cards is often more convenient than relying on one very large card.
A practical approach is to use one card for the current ride and keep a backup card in a waterproof card holder. This protects your recording options if the first card fills up, becomes corrupted, or is accidentally left in a computer.
Before an important ride, format the card in the camera after backing up existing footage. This can reduce the chance of file-management problems and helps ensure that the camera is ready to record.
6. Lens Protectors and Protective Housing
The lens is the most vulnerable part of an action camera. It is exposed to rain, dust, mud, branches, gravel spray, and accidental drops. A small scratch, smear, or crack can affect every video you record.
A removable lens protector is a practical investment for trail riding, gravel riding, commuting in wet weather, and bikepacking. It is easier and cheaper to replace a protector than a camera lens. Clean it with a microfiber cloth, and replace it if it becomes heavily scratched.
For severe weather or water exposure, a protective housing may be useful. Some action cameras are water-resistant without a housing, but a dedicated case can add confidence when riding through heavy rain, deep mud, puddles, or river crossings. It can also provide additional impact protection.
Keep in mind that a housing may affect audio quality and make the camera larger. Use it when conditions require it rather than leaving it on for every ride. Weather protection, mounting options, storage capacity, and battery life are all important considerations when choosing a camera setup for cyclists.
7. A Safety Tether
A safety tether is a low-cost accessory that can prevent an expensive loss. It connects your action camera or mount to the bike, helmet, chest harness, or another secure point. If the mount fails during a pothole impact, crash, jump, or rough descent, the tether can stop the camera from flying into the road, forest, or water.
This accessory is especially useful for mountain biking, fast descents, gravel riding, and off-road adventures. It also makes sense for a rear-facing camera mounted under a saddle, where it may be difficult to notice a loose connection during the ride.
Use a tether that does not interfere with pedals, wheels, cables, steering, or brakes. After attaching it, turn the handlebars fully in both directions and inspect the cable path before riding.
8. An External Microphone or Wind-Reduction Solution
Cycling video is not only about images. Natural sounds—tires on gravel, freehub noise, trail chatter, a flowing river, or a rider’s commentary—can make footage more immersive. Unfortunately, wind noise can dominate a built-in microphone at speed.
An external microphone may improve spoken audio for bike reviews, ride narration, tutorials, and vlog-style content. Depending on the camera, you may need a compatible audio adapter or media housing. Position the microphone where it is protected from direct wind while still able to capture your voice clearly.
For many cyclists, a simpler option is a wind-reduction cover or foam shield made for the camera’s built-in microphones. It will not eliminate all wind noise, but it can make the audio more usable during moderate-speed riding.
If live audio is not important, record video normally and add narration, music, or route information during editing. This can be more effective than trying to capture clean speech while descending at speed.
9. A Remote Control
A remote control is a convenient way to start and stop recording without reaching for the camera. This can be particularly useful when the camera is mounted on a helmet, under a saddle, or in a position that is difficult to access safely.
For example, a road cyclist may use a handlebar-mounted remote to begin recording before a descent or a busy traffic section. A mountain biker may use a remote to activate the camera before a trail feature. The benefit is not only convenience: it can also save battery life and storage by helping you record only the segments that matter.
Choose a weather-resistant remote with clear buttons that are easy to use while wearing gloves. Pair and test it before riding, and confirm that it remains connected over the distance between your handlebar and camera.
10. A Compact Carrying Case
An organized carrying case protects your equipment and makes it easier to use consistently. A good case can hold the camera, spare batteries, charger, memory cards, mounts, cables, lens cloth, and small adapters in one place.
Choose a case with padded compartments or adjustable dividers. For cycling, a compact case is often best because it can fit into a backpack, frame bag, handlebar bag, or car glove compartment. If you ride in unpredictable weather, consider a water-resistant case.
Keeping accessories organized has a practical benefit: you are less likely to leave a battery, memory card, or essential mount at home. It also makes it easier to switch configurations during a ride or pack for a weekend cycling trip.
11. A Small Tripod or Handheld Grip
Most cycling footage is recorded while moving, but a small tripod or handheld grip adds creative options. You can use it to film a quick bike setup shot, capture yourself riding past a scenic location, record a repair stop, or create stable talking-to-camera segments.
A short grip can also work as a temporary selfie stick for rider-facing clips. Choose a lightweight model with a secure mount and a compact folded size. For outdoor use, make sure it can stand securely on uneven ground.
This accessory is especially useful for cyclists making travel videos, gear reviews, route guides, or social-media content. Even a few static clips can make a longer ride video more engaging by breaking up continuous forward-facing footage.
Better Videos Start With Preparation
The best accessory kit is not necessarily the largest or most expensive one. It is the one that supports your actual riding style. A commuter may need a stable handlebar mount, rear-facing mount, spare battery, tether, and high-capacity microSD card. A mountain biker may prioritize a chest mount, lens protector, rugged housing, extra batteries, and quick-release adapters. A bikepacker may focus on battery charging, compact storage, weather protection, and flexible mounting options.
Before every ride, take one minute to check the essentials:
-
Confirm the battery is charged.
-
Verify the memory card has enough free space.
-
Clean the lens or lens protector.
-
Tighten the mount and attach the safety tether.
-
Check that the frame is level and aimed correctly.
-
Select a recording resolution and frame rate that match the ride.
-
Carry spare power for longer routes.
These habits prevent most avoidable problems and help ensure that your action camera for cycling is ready when the best moment arrives.
Recommended Action Camera for Cycling
Once your accessory setup is ready, consider the SJCAM SJ6 Ultra action camera for recording your rides. Pair it with a secure bike mount, a chest or helmet mount for alternate perspectives, a fast microSD card, spare batteries, and a safety tether. This combination can help you capture commutes, road rides, gravel routes, and trail adventures with greater confidence and more creative flexibility.