How to Use an HVLP Paint Sprayer Like a Pro: A Beginner's Guide
Posted by Liem Anaida
Filed in Technology 236 views
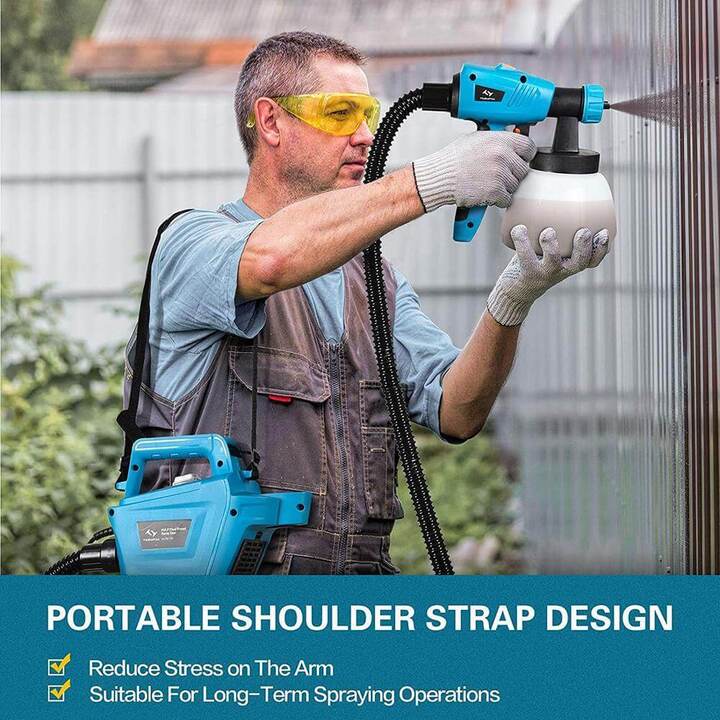
If you've ever spent hours brushing and rolling paint onto a project only to end up with brush marks, uneven coverage, and a sore wrist, it's time to meet your new best friend: the HVLP paint sprayer. Standing for high volume, low pressure, this tool has become the go-to choice for DIYers and professionals alike who want smooth, professional-grade finishes on furniture, cabinets, trim, and more.
But here's the thing—an HVLP paint sprayer is only as good as the person holding it. If you've never used one before, you might find yourself fighting with sputtering, dripping, or uneven coats. That's where this guide comes in. By the time you finish reading, you'll know exactly how to set up, spray, and clean your HVLP paint sprayer like a seasoned pro.
What Is an HVLP Paint Sprayer?
Before we dive into technique, let's quickly cover what makes an HVLP paint sprayer different from other sprayers. The name says it all: High Volume, Low Pressure. These sprayers move a large volume of air at relatively low pressure (typically around 10 PSI at the tip) to atomize paint into a fine, controlled mist.
The big advantage? Less overspray. Unlike airless sprayers that blast paint out at high pressure, HVLP systems put more paint on your surface and less into the air around it. That means less wasted material, less cleanup, and a cleaner workspace. It also means you get a softer, more controlled spray pattern—ideal for detailed work and thin coatings like stains, lacquers, varnishes, and lighter paints.
Step 1: Choose the Right Paint and Thin It Properly
This is where most beginners go wrong. They load their HVLP paint sprayer with paint straight from the can and wonder why it sputters, clogs, or sprays in globs. The reality is that most off-the-shelf paints are too thick for an HVLP system and need to be thinned.
Check the Viscosity
Start by checking the paint's viscosity. A simple way to do this at home is the funnel test. Pour some paint through a small funnel and time how long it takes. As a general rule, paint should flow through like heavy cream—not like honey.
Most latex and acrylic paints need 10–15% water or a compatible thinning agent. Oil-based paints may require mineral spirits or paint thinner. Always check the manufacturer's guidelines on the paint can first and thin gradually—you can always add more, but you can't take it out.
Strain Your Paint
Even after thinning, pour your paint through a fine mesh strainer (available at any hardware store) before loading the sprayer. This catches dried bits, clumps, and impurities that will absolutely clog your spray tip mid-project. A five-second strain can save you a twenty-minute cleanup.
Step 2: Set Up Your Workspace
A clean, organized workspace isn't just about safety—it directly affects the quality of your finish.
Ventilation Is Non-Negotiable
HVLP sprayers still produce airborne particles, and if you're spraying oil-based paints or lacquers, those fumes are hazardous. Work in a well-ventilated area—ideally outdoors or in a garage with the door open and a fan pushing air out. Wear a respirator rated for organic vapors, not just a dust mask.
Prepare Your Surface Area
Lay down drop cloths to catch overspray. Set up a makeshift spray booth if you can—even a cardboard box with the sides cut out can help contain the mess. Hang or elevate your workpiece so you can spray from all angles without bending over.
Light It Up
Good lighting is critical. You need to see the wet edge of your paint as you spray to ensure even coverage. Shadows hide thin spots until it's too late. Set up a work light if your space is dim.
Step 3: Set Up Your HVLP Paint Sprayer
Now let's get your HVLP paint sprayer ready to go. While exact steps vary by model, the fundamentals are the same.
Adjust the Fluid Control
Most HVLP sprayers have a fluid adjustment knob near the trigger or on the cup. Start with it set to about halfway open. You'll fine-tune from there based on your paint and project.
Adjust the Airflow
Turn the air control (if your model has one) to full. You can dial it back if you're getting too much bounce-back, but it's better to start high and adjust downward.
Test the Pattern
Point the sprayer at a piece of cardboard or scrap wood — never directly at the floor or wall. Pull the trigger and observe the spray pattern. A good pattern should look like an even, elongated oval with no heavy spots in the middle or splatters at the edges.
- Too much paint in the center? Turn the fluid control down.
- Sputtering or spitting? The paint may be too thick, or the cup is running low.
- Uneven pattern? Clean the air cap and tip — dried paint buildup is usually the culprit.
Step 4: Master Your Spraying Technique
Here's where practice separates the pros from the frustrated. The good news? The technique is simple to learn if you follow a few rules.
Maintain the Right Distance
Hold the sprayer 6 to 8 inches from the surface. Too close and you'll get drips and runs. Too far and the paint will dry before it hits the surface, creating a rough, pebbly texture called "orange peel."
Keep It Moving
Never, ever stop moving while the trigger is pulled. Start your stroke slightly before the edge of the surface, pull the trigger, sweep across at a steady pace, and release the trigger just past the opposite edge. That motion should be smooth and continuous — like spray painting with a can.
Overlap Each Pass
Each pass should overlap the previous one by about 50%. This ensures you don't leave thin streaks between strokes. Think of it like mowing a lawn: you want each pass to cover half of the last one.
Watch Your Wrist
Keep your wrist straight and your arm parallel to the surface. If you arc your wrist at the ends of each stroke, the sprayer gets closer to the surface in the center and farther at the edges, creating an uneven coat. Move your whole arm, not just your hand.
Layer, Don't Drench
Apply multiple thin coats rather than one thick one. A single heavy coat will run and sag. Two or three light coats, with proper drying time between them, will give you that glass-smooth finish you're after.
Step 5: Common Beginner Mistakes (And How to Avoid Them)
Even experienced sprayers slip up sometimes. Here are the most common issues beginners face and how to fix them.
Runs and Drips
This happens when you apply too much paint in one spot. Usually it's because you're moving too slowly, holding the sprayer too close, or overlapping too much. Speed up your pass or back off the fluid control.
Orange Peel Texture
That bumpy surface that looks like an orange rind is caused by paint particles drying before they hit the surface. This can happen if you're too far away, the paint is too thick, or the air pressure is too high. Bring the sprayer closer or thin the paint a little more.
Spitting and Sputtering
This usually means air is getting into the fluid line. Check that your paint cup is seated properly and that the pickup tube is submerged. It can also happen if the paint is too thick or the sprayer needs cleaning.
Blushing or Hazing
A milky white haze on the finish is called blushing, and it's caused by moisture or humidity. Spraying lacquer or shellac on a humid day is the most common cause. If you live in a humid climate, consider a moisture trap for your air line.
Step 6: Cleaning Your HVLP Paint Sprayer (Do NOT Skip This)
Here's the hard truth: if you don't clean your HVLP paint sprayer immediately after use, it will clog, rust, and fail. Paint dries fast inside those tiny passages, and once it does, disassembly and deep cleaning become a nightmare.
For Water-Based Paints
Disconnect the sprayer. Empty any remaining paint back into the can. Fill the cup with warm, soapy water, reattach, and spray through until the water runs clear. Then disassemble the tip, air cap, and needle, and clean each part individually with a soft brush. Rinse and dry thoroughly before reassembly.
For Oil-Based Paints
Same process but use mineral spirits or paint thinner instead of water. Work in a well-ventilated area and dispose of solvent-soaked rags properly — they are a fire hazard and can spontaneously combust.
Store Properly
Once everything is clean and dry, store your sprayer in a clean, dry place. Never leave paint in the cup between uses, even overnight. That's the fastest way to ruin a perfectly good sprayer.
Why Choose the Tilswall 800W HVLP Paint Sprayer?
If you're ready to put all of this knowledge to work, you need a sprayer that won't fight you every step of the way. That's where the Tilswall 800W HVLP Paint Sprayer comes in.
Designed with beginners in mind but powerful enough for experienced users, the Tilswall 800W offers a smooth, consistent spray that makes achieving professional results far easier than it has any right to be. Its 800-watt motor delivers strong, steady airflow while keeping the pressure low enough for precise control — exactly what HVLP is supposed to do.
Key features include three spray patterns (horizontal, vertical, and circular) so you can adapt to any surface, adjustable flow control to fine-tune your paint delivery, and a high-capacity 1000ml copper-plated cup that resists corrosion and holds enough paint for medium-sized projects without constant refills. The sprayer also comes with two additional nozzles and a cleaning brush kit, so you have everything you need right out of the box.
The Tilswall 800W is ideal for furniture, cabinets, fences, doors, trim, craft projects, and more. Whether you're refinishing a vintage dresser, painting kitchen cabinets, or tackling a backyard fence, this sprayer gives you the control and finish quality you'd expect from a much more expensive tool.
And because Tilswall knows that beginners have questions, the sprayer comes with a clear instruction manual and responsive customer support. Combined with its durable build and reasonable price point, it's the perfect entry point into HVLP spraying.
Final Thoughts
Using an HVLP paint sprayer isn't hard — but it does require a little knowledge and practice. Thin your paint properly, set up your workspace, dial in your spray pattern, and keep that arm moving. Once you get the hang of it, you'll never want to pick up a brush again.
Start with a reliable sprayer like the Tilswall 800W, follow the steps in this guide, and you'll be laying down smooth, professional finishes before you know it. Happy spraying!